

A
fun cake for my mom for mother's day. So much work!!!!!!!! Ok, this one I am NOT repeating....but here it is. I started it on Friday morning...and finished Sunday..my guess is that it took me around 8 hours...OK this is what you need:
- Red fondant for the flowers, or any colour you want
- 200 grams of brown fondant.
- Some green fondant for the leaves
- A cake mix for the cake
- Nutella to make the fondant stick to the cream (although warning: I would use buttercream).
- Some red fondant for the flowers.
- Some little candy sprinkles for the "seeds" of the flowers.
- Some Oreo cookies to make the "dirt".
- Lots and lots and lots of ganas and 8 to 10 hours.
- And loads of patience as well.
First, pick the colour of the fondant, I picked this one I had already had. Honestly, this brand tastes so bad...
I know I am not supposed to say this here, but it gives me the creeps this brand...dont buy this one..and I cannot remember the name now.
Roll out the fondant. Another BIG MISTAKE: do not roll it like me on foil paper, because it sticks
to it and it is a pain to get it up, roll it out on cling film with some flour or caster sugar.
Get a cookie cutter in the shape of a flower. It does not need to be an amazing cutter, just a normal flower and then you can shape it a little and nuance the shape.
Get as many flowers as you can, because some of them will get messed up when you lift them.
these are the two cookie cutters I used that my great friend Isabel from WV gave me for Christmas, mi amigo invisible!!! :)
what a real nightmare to get them up....DO NOT DO THEM ON FOIL PAPER...major mistake, use clingfilm.
this is what I used to hold the flowers and make keep a nice natural shape
I separated the petals with a kebab stick
then I smashed a little the petals to make them more realistic, thinner and more delicate
I placed them here then, to make them keep the shape, a little upwards, as if they were opening up
now with a little bit of water, put a drop of water in the middle of the flower and stick a little sugar
candy ball to make them look like the seeds of the flower
water is all you need, let them dry, and do not put too much water, a little drop works as a glue
I had a lof of random decorations....
this is to show the mess of my living room kitchen
ok, the top flowers done, now let's do leafs, oh man! so much work!!!!
roll it up, this time I used marshmellow fondant. Marshmellow fondant has a good flavour and it is so much easier to roll and mold..it is great for flowers or leafs. Really try it. I bought this fondant for 2.50 euro and it was 250 grams AND! you do not have to die it.
this is the cutter I used, as you can see it was really simple, and then you can improve them
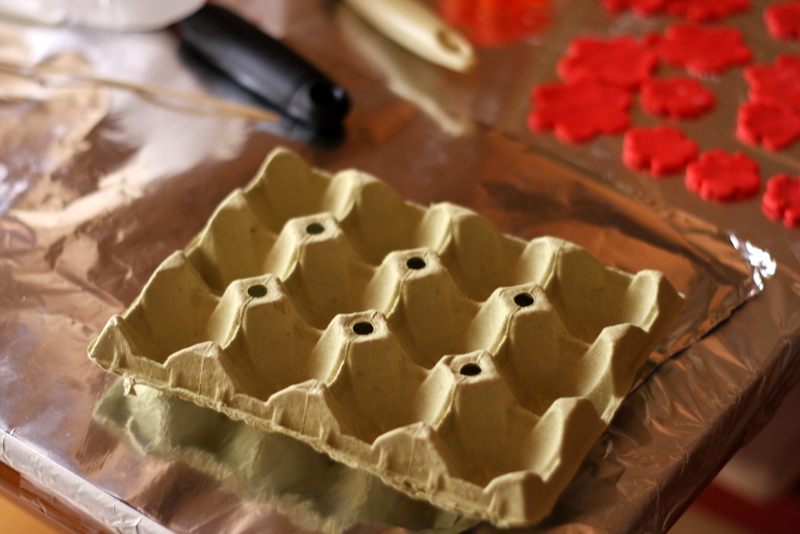
place them again in the egg box
let them dry over night, so that they maintain the cool shapes
the mess I had....it was getting really really messy...
OK, this is on satuday morning, a new day, I left fondant behind, and started working on the cake
I did the recipe I always do
and added some chocolate chips to the dough to make it more tasty...it worked actually, it always works
i made two cakes, one rectangular and one circled one
ok done
now I tried to measure the cake, and drew these circles
put them together, to see how they were looking....looking a little crooked...
this is how you fix it, by adding random pieces to make look balanced
looking pretty good
now I used a knife to make it more round and smooth
looking good....ok, now I added nutella to make the fondant stick around
it was hard to have nutella....NOT A GOOD IDEA...so do not do it, use BUTTERCREAM, much better
I placed it in the fridge so that it would harden a little before adding the fondant
this is the fondant, that I cut in pieces, this is sugar from fondant from a pastry shop, I cut it up in pieces and then put it on the microwave to soften it up a little.
then you have knead it, I did not want to take many photos because I did not want to be using my camear while kneading the fondant
I dyed it with brown Wilton fondant
I used brown food colouring and a tiny bit of orange, just two drops
Ok THIS IS WHERE I WENT WRONG...DO NOT DO THIS BELOW, it does not work....
this is the result.....not very pretty....there was way too much fondant, and it was so difficult to make it look good around the cake.....
fortunately I had saved this piece of fondant and rolled it and used to to put a SECOND LAYER of fondant, and then, I was able to make it look more smooth
I had a stamp that I used to make these leafs, to decorate the pot because I was afraid it was going to look terrible after my major mistake...
ok, I wrapped the fondant around and let it dry like that for about 3 hours
I went to meet friends, and came back at 11 pm! bye silly pot...I was really fed up at this point
back home I turned it around and it wasnt looking so bad
I bought some areas, and smashed them to make it look like dirt
I put on the "dirt", pretty good dirt...
it looked very realistic...I was glad about this and also about the colour of the fondant of the pot
I scraped off the top of the cake to make the dirt fit....and emptied it out a little
I added the flowers and the leaves
looking good! the end was in sight! finally....
my flowers were looking good too...
ok good night pot! I have had enough! I let it dry overnight like that, so that it would harden...and glued the leaves onto the pot with water.
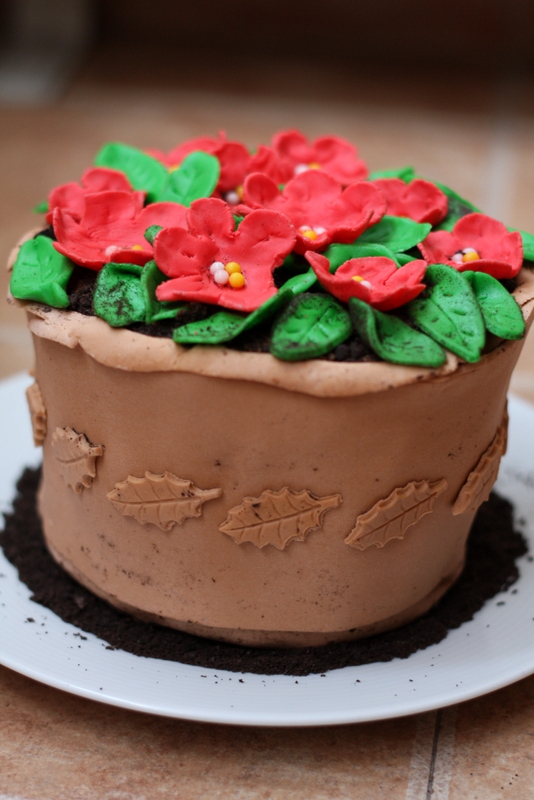
Good morning pot!! it was looking good! I was glad to see it done, the day was here
I had to take millions of photos....honestly this cake was SO MUCH WORK! ugh! so glad it was over
the brown leaves looked great
not the edges of the pot, honestly I was so tired the night before that I did not care anymore
at home, at my parents...Ok, when I got there I realized that the dirt and everything had moved around, it was awful! everything was messy and the pot was dirty with the Oreo dirt...
but they, it kinda made it look more realistic, didnt it??
it was pretty though! the pot was "dirty"...but hey, aren't pots supossed to be like that?
a little detail here
nice! even though it had moved around it looked quite good
i loved the fondant green leaves
i was ready to murder it though!
did I tell you I dreamt about the cake the night before??
yeah! first bite


