Sunday, August 30, 2020

How to Make Sour Cream


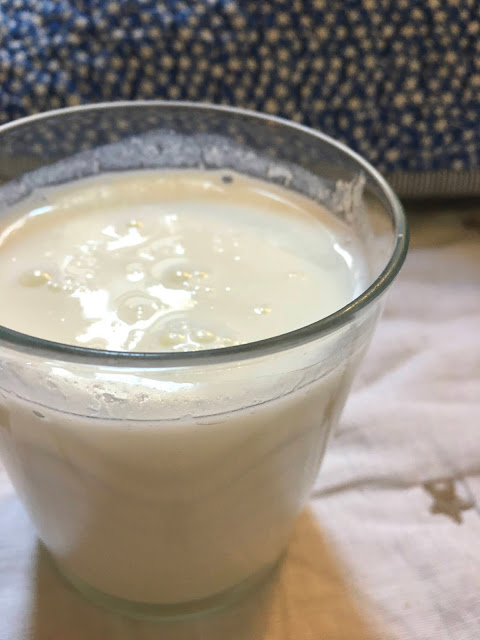
Sour cream is not easy to recreate. I have found it the hardest of all the experiments I have been doing. But you can create something similar to the stuff you find in supermarkets in the USA. I have done 3 experiments and so far this has been the most convincing one. I am open to better recipes you all, if you have any. Consistency wise I was happy but flavour not so much. Also you do not need lemon and vinegar as some recipes call, vinegar is way too much in my view for sour cream, even lemon can be too much, but yes with lemon is the best I have found.

Anyway, this is my recipe for now 

INGREDIENTS:

-200 Ml of double cream (nata de montar with 36% fat).
-2 tablespoons of lemon juice.


STEPS:
1. Add the lemon to the cream in a bowl and stir with energy.
2. Let it sit for 24 hours (in the winter I put it near my heating, around 20 degrees, otherwise it will not ferment).
3. The following day just stir it all again and now put in fridge for a few hours.
4. That's it. It will have thicken quite a bit. Now  add caster sugar if you want, a tiny, but it is not necessary.  

Not perfect, I know, but at least in case you need it, you can recreate it. I used it for a dessert and it was real good.

Monday, August 24, 2020

How to make Crême Fraîche


So I was doing a jewish recipe and came across this nata fresca or
creme fraiche

I was like: okay and what the heck is that now? and it is NOT SOUR CREAM, NOPE!  This cream is fermented with dariy ferments and sour cream is fermented with acidic ferments like vinegar and lemon so it is a lot more acidic. This cream is so nice but has a tang to it, but not that much. 

So another new concept, it never ends, but hey this is why cooking is so fun, isn't it? It is like a wonderful lesson of interesting chemistry that you actually get to eat later. This post was probably the best. 

But it isn't hard, you only need 2 things.

INGREDIENTS:

-1.5 tablespoons of natural yogurt.
-250 ml of heavy cream.

No steps, just mix it all together at room temperature and then let it sit for 24 hours near the heating, so around 20 degrees. It will thicken, after the 24 hours, stir together and place in fridge and it will thicken even more in a mason jar. 

Voila, le secret de la francaise cuisine. 

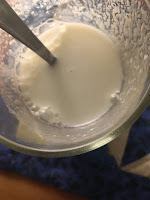
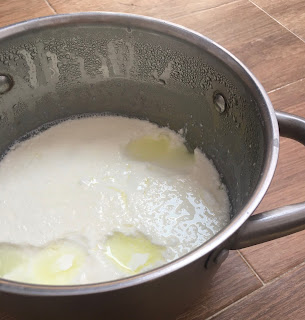
So the photos here below are the one on the left, after the 24 hours, it was ready, and had thicken and then the photo on the right is after one night in the fridge. It was so so good, and the texture like a dream come true. Imagine adding sugar to it.....

Tuesday, August 11, 2020

How to make Buttermilk (buttermilk substitute really)


What is buttermilk? it it the milk that is left when one makes butter. So yeah, that white liquid that comes out once you beat the cream and it separates, into water aka buttermilk! and the butter. See my recipe of butter to see it with your own eyes in a bowl.
 
But today's brands make it by adding acidity to the milk. So it is not buttermilk per se,but the closest apparently. Super easy and quick. These experiments are worth doing because, who has time to learn this stuff when you actually need it?? I followed for this recipe this fun blogger.  She was the clearest. Also if you are in a crazy rush you can even put everything in the microwave in 45 seconds! But here is the traditional method.

INGREDIENTS:  
-1 cup of milk. 
-2 tablespoons of lemon juice or white vinegar. 

STEPS:
1. In the cup of milk, place the lemon juice and stir. 
2. Now let it sit for 30 minutes. It will start to curdle. 
3. Give it all a good stir after 30 minutes and you got it. Your pancakes are ready to rock.


Saturday, August 8, 2020

How to make basic & easy Granola


Granola is super easy. All you need to do is find the right mix of sweet and salty in your mix.
I followed this recipe, with a few alterations and it was a real success. I thought I would post immediately to not forget.

INGREDIENTS:

-300 grms of oats.
-100 ml or 1/2 american cup of honey.
-50 ml of sunflower oil 
(or a neutral oil)
-1/2 teaspoon of salt (very important)
-1/2 of nutmeg, cinnamon and mixed spices that are cinnamony.
-100 grms of mixed nuts.
-50 grms of dried fruit.

STEPS

1. Mix the oil, honey, spices and salt in a bowl and whisk together.
2. Add the oats and stir to coat evenly.
3. Try and see if it needs more salt. If you have put too much honey just compensate with salt. It is very important to find the balance of sweet and salty.
4. Now stick in oven to 170 degrees on baking paper both high and top for 10 minutes. 
5. Bring it out of the oven and stir the oats and put it in the oven again for another 5-10 minutes until it is toasted. 
6. Keep an eye on the oven so that it doesn't burn!  and now, it should be done. Add the dried fruit and stir and let it cool off.


Yum! seriously so good. Kenton was so impressed. The key is to find the balance of flavours, also don't put too much cinnamon but use nutmeg to tame that flavour. Wow. 

Thursday, August 6, 2020

How to make Mayonnaise


I can see why sweet Julia Child loved to make mayonnaise because it is a total scientific experiment. I mean that eggs and oil turn into that white, creamy, velvety white sauce just like that blows away  all my brains together! 

So coming up with a decent recipe only took me two tries. So here is the winner recipe. Now before you mess it up, mark my words, DO NOT USE OLIVE OIL. That is what I did the first time and it was game over. 


INGREDIENTS:
-1 egg.
-3/4 american cup of sunflower oil (177 ml).
-1 spoonful of lemon juice.
-1 teaspoon of white vinegar.
-1/3 teaspoon of white sugar.
-1 spoonful of normal mustard.

STEPS:

1. Place the egg in the cup and now add the vinegar, lemon, oil and salt. Let it all sit there in peace for 3 minutes so that the temperature unifies.
2. Now stick your hand blender all the way to the bottom and start mixing WITHOUT MOVING THE HAND MIXER. Hold it there still for 1 minute, not moving it until the emulsion begins. (What a spectacle to see it come together! It is quite beautiful really).
3. Now start pulling up (towards you) your hand mixer as you keep the bottom on very very slowly and it all keeps coming together, the emulsion. Once it is nearly all mixed then move the hand mixer up and then and finish it all until it is all beautifully mixed.
4. That's really it! Now season it with the white sugar just a little, and the mustard, yes mustard, and stir with spoon and really, it tastes pretty similar to the mayonnaise in the supermarket.

You can leave the mustard and sugar out but the stuff that is in the supermarket really have these ingredients. 

I like this recipe because I barely ever use mayonnaise, so if I ever need for a recipe I can just buy it and not have all this jars that in the end I have to throw out.


Monday, August 3, 2020

How to Make Kefir Taste Good


Kefir is really a no brainer to do.

It is so easy that I feel silly to be posting this recipe here. However I did think it was a good idea to post on how to make kefir taste good because kefir can taste a bit odd, let's be honest.  

To make kefir you simply need kefir grains, which is a culture, and milk.  It looks basically like a mini couliflower and you can get these at organic stores, etc. With time, especially during summer, they grow so much and then you can give them to your friends.  

To make kefir, simply put the grains in a jar and add milk and leave it outside for a day. That's it. It ferments the milk and produces kefir. Now just sieve the grains through a strainer and that's it, you have your kefir-milk done for you. Now put it in the fridge to cool off which will improve the consistency too and make it more like liquid yoghurt.

I would say one heaped tablespoon of kefir ferments perfectly fine in a 250 ml or a glass of milk in 24 hours.  During the summer I would say the fermentation time is cut in half, that is in about 12 hours your kefir is ready. Now to my point. How do you make kefir taste good?

1. Firstly I would say here that kefir is very much an acquired taste. 

The first 2 weeks of making kefir, I threw so much away! liters of milk basically, but slowly I started liking it more and more because it is a very tarry acidic taste that you simply get used to with time, just like with wine or beer.

2. Second fermentation really helps. 

And what is second fermentation? Simply add a peel of a lemon, or a slice of lemon, or a slice of an orange, of grapefruit etc. and stick in the fridge I like second fermentation with citrics because it matches the acidity and makes it more vibrant. But you can put any fruit really.

3. Blend it with bananas.

 And if you really want your kefir to taste really good and sweet and yummy, add bananas and make a smoothie with your kefir. Bananas go incredibly well with kefir because of the sugars they have....it will taste super yummy, and not like kefir at all. This is probably the best recipe I read out there.

4. Now do not have way too much.

Kefir is a very strong drink with many probiotics and all that. However, you cannot have too much or you will simply live in the bathroom. I have about 3 or 4 sips after I get back from running every day, but that's it, I would not have more than that because it is very strong. Also, sieve the grains well and do not eat the grains unless you want to have gut problems.


Saturday, August 1, 2020

How to make Yoghurt

I never thought I could make yoghurt but it is so easy and delicious. You can do it too. To be honest, you might be better off watching some videos for this recipe as I think it is more self-explanatory for this recipe. I followed this video and this video and worked great for me. 

Here is what you need:

INGRE-DIENTS:

-1,5 litre or more of whole milk.
-another yoghurt with the bacteria or culture to make yoghurt (also called "starter").
-a thermometer

STEPS:

1. Heat up the milk in a pot and stir it as it warms up so that it doesn't burn. 

2. Bring the milk to 180 Fahrenheit degrees (or 82 degrees Celsius) and do not let it boil but maintain it here for a couple of minutes constantly stirring away, lower the temperature if you need to so that it doesn't burn.

3. Now take away from the burner, and go away for a while (I usually take a shower here) and leave the milk to cool off to 110-115 degrees (around 40-43 degree). The temperature has to drop down and you need to be able to stick your finger and it should feel like baby milk temperature.


4. Now in a separate bowl, get your old yoghurt room temperature that contains the culture necessary to make more yoghurt. Mix the old yoghurt or 3 big spoonfuls with a little bit of the milk from your pot, like one spoonful.

5. Gently mix the milk and the starter in a little separate bowl and when you are done, gently add to the pot where you have the milk at 110 degrees. Slowly add everything, and voila, you already have the beautiful bacteria in your milk. 110 degrees is the magic temperature that you need for the bacteria to activate and convert your milk into yoghurt.


6. Now put the lid on your pot and gently wrap up the pot with blankets.  Yes blankets you heard well. What you want is to keep those 110 degrees going for as many hours as you can. Stick it in the oven so that it is warm.

7. Let it work overnight (like 10 hours) and in the morning your yoghurt should be there! 

8. Now you can put some paper towel to absorb the yellow liquid that comes to the surface, whey, and now stick in the fridge for 2 or 3 hours so that it solidifies even more.

And that's it! 
Your homemade yoghurt is there! Enjoy.

And the question is: 
do you really need a thermometer? and the answer is no, not really, but I think it would help you the first times you do it, but really the trick is to add the starter/yoghurt when the milk is warm for babies.