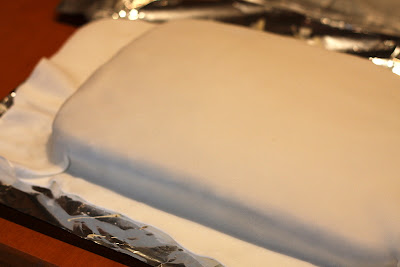
 I made this cake for Father's Day this year. It was a fun project but as any cake, a lot of work. Very worth it though. Be ready to spend around 5 hours on the whole thing.
Ingredients:
- 1/2 kg on fondant.
- Food colouring, red, blue, and green.
- A ready to make cake mix.
- 100 grms of white chocolate.
- 5 hours of your precious time.
1. I got a cake mix I had from Lidl, and just did it. I added some blue food colouring to make it more fun.
I guess it was muffin mix, with chocolate chips, that will do!
I kept adding blue food colouring until I got the shade I wanted. Blue is a really tricky colour to get...because it turns sort of green.
 I loved the swirls and kept taking shots
 I used Wilton food colouring, it is a good investment...life is so much more fun with colours!
I added the chocolate chips, fun!

The baking pan is very important, it has to have round corners to imitate the folded corners of the shirt.
Done, my brother was home from Germany! and he helped me flip the cake onto the tray.
Let the cake cool now completely, completely! I actually left cool overnight, I did it on friday night and worked on the fondant the following day.
I put it then in the fridge for about 30 min so that it would cool off and harden a little.
I began rolling the fondant...and added some cornstarch on the table so that it wouldn't stick to it (to the foil paper that I covered the table with, and fixed to it with cello tape).
At this point I had my flatmate Amy help me to trasspass the fondant to the cake. 4 hands is better than 2.
TADAHHHHHHHHHHHHHHH! not bad
I had the "goal cake" on my computer always in sight!
OK, now time to fold up the cake, or the shirt. It was easy, fondant has a cool texture and is moldable.
Then I cut off the left over edges of the fondant.
OK, now it was looking the way I wanted it.
I added a little pocket and imitated some sewing sitches with a kebab stick.
Then, work on the tie. I had already this piece of bright red fondant so I used it.
And then, cut it up to make it look like a tie.
Looking good....it was tricky to lift it up because it was getting stuck to the foil all the time...this where the time goes in these projects.
OK, place it on the cake, but dont fix it yet...make sure it all looks good together before you "glue" it with water.
Now, I wanted to add some stripes to the tie, to imitate my dad's tie that I was after. Get a little piece of fondant and dab some food colouring and then mix it up so the colour is even throughout the fondant.
Kept looking at the goal....
I added then the neck, to make sure it was all making sense.
the blue fondant was ready...
Cut up the pieces and let them dry so that they easier to handle and move around. After 1 hour, they have a very different texture and are much easier to work with.
same thing with the green stripes, just a little piece of fondant, and then add the food colouring with a tooth pick
This is a shot of the massive mess I made in my living room, I had to bring it all here because my kitchen table was not big enough to roll the fondant on....what a mess! oh well...it was fun..
Lines added! shirt done!!! THIS IS THE MOMENT when I glued the tie, neck of the shirt and pocket and lines to the cake. You simply do it dabbing some water to the fondant and it does stick it all together, because it is all sugar.
And now let it dry over night....this is why this shot is dark, it was at night.
And now let it dry over night....this is why this shot is dark, it was at night.
and he liked it!!! this is at home
this is what I was after....not bad!
side shot
first bite! honestly I had no idea what the colour inside would really look like...but it wasnt bad.
My nephews asked me for the neck....so sad, but hey, that is why I did it! so fun, try it!


No comments:
Post a Comment