Showing posts with label cake. Show all posts

Friday, January 12, 2024

My Christmas and Easter Lamb


So the story of this lamb mold started last Easter when Kenton and I ate pizza for Resurrection Sunday and it was the most depressing thing ever. 
-"We need traditions!", I told him.  

So I went back into Pinterest and looked into my Easter pins and found this awesome lamb cake so my friend Cristina, brought it all the way from me from the USA.

25 bucks is a great investment for this mold! and I thought: why not use it for Christmas? At the end of the day we celebrate the birth of the Lamb of God, so I made it of chocolate. 

And here is the winner recipe that rocked my world. A heavy, very chocolaty cake. I followed the recipe that cake with the mold, but then added a ton of dutch cocoa. YUUUUUUM you all. This recipe is a keeper, even my mom agreed.
 

INGREDIENTS

-1/2 cup of butter, 115 grams 
-2 eggs
-3/4 cup of buttermilk
-1 tsp baking soda
-1+1/2 tsp of baking powder
-2 cups of flour, 240 grams.
-100 grams of chocolate 70%.
-4 tablespoons of Dutch cocoa.
-1 cup of white sugar, 200 grams.

STEPS:
1. Mix butter and sugar and vanilla and eggs until light and fluffy with mixer.
2. Now add to the mix, the dry ingredients: flour, baking powder, baking soda.
3. Then add the 100 grams of chocolate melted (in the microwave will do), the buttermilk and then the cocoa powder
4. Butter the mold well, with a lot of butter and then sprinkle with a lot of flour. This is key for your lamb to work well. 
5. Bake in 180 degrees for about 40 minutes.
6. Let it cool off for a long time! and then sprinkle it with powder sugar. Wow. Gorgeous lamb.

The mold is from Nordic Ware Spring by the way. And the blueberry recipe lamb is from my blueberries muffins.
  

Thursday, July 22, 2021

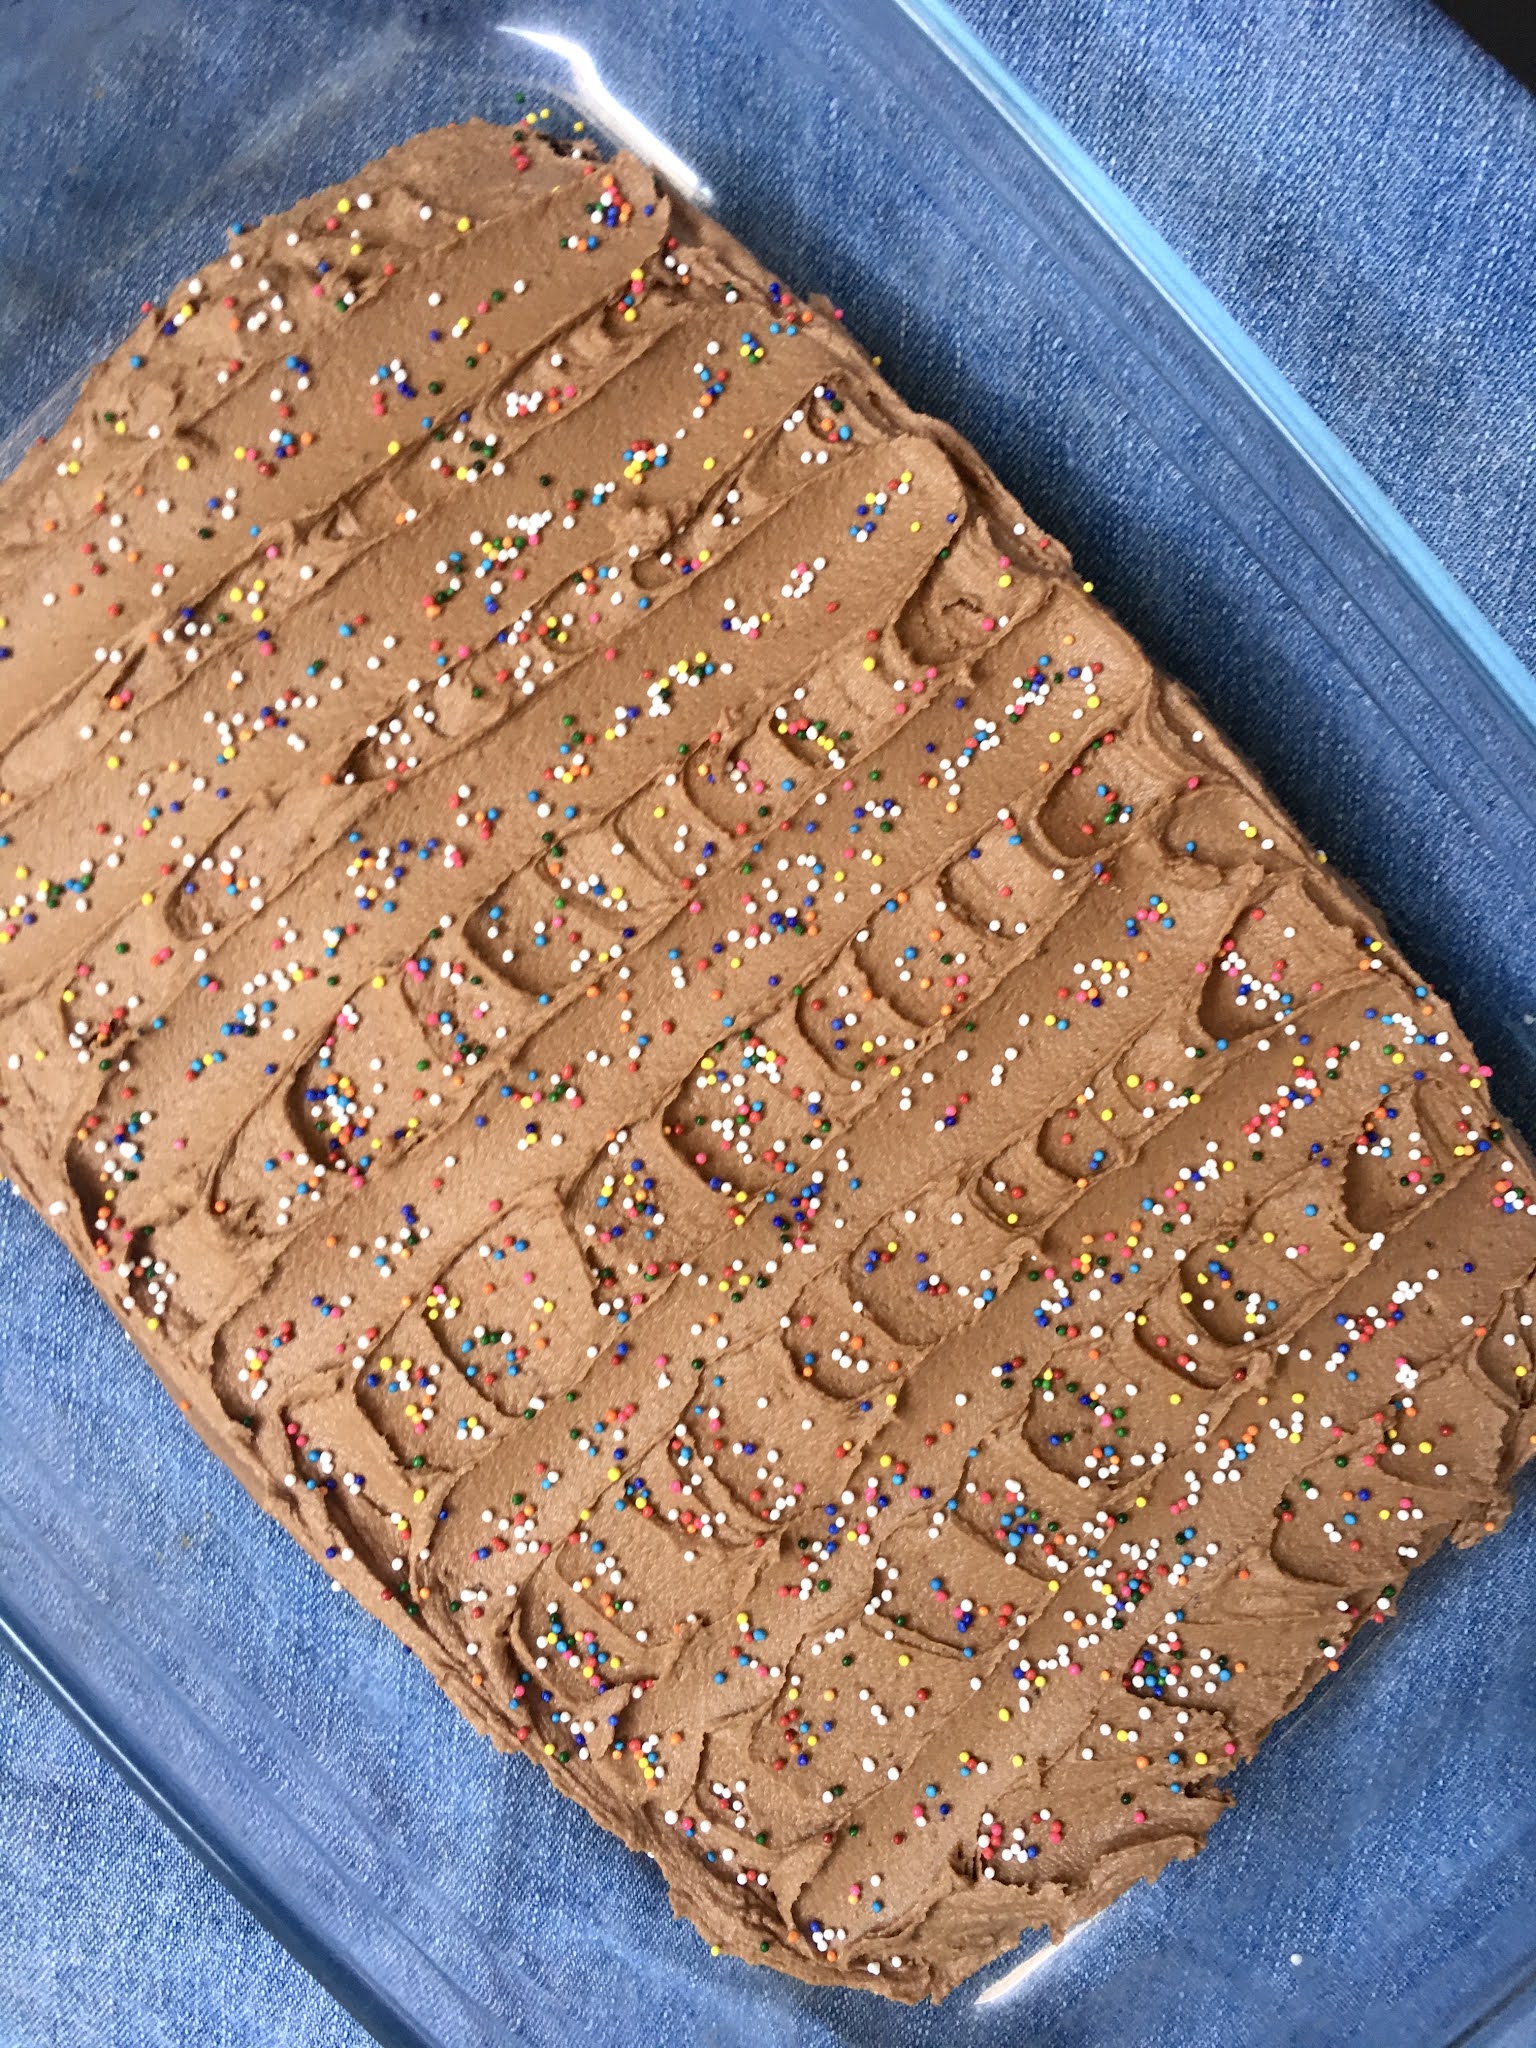
Rustic Easy Chocolate Cake


I think everyone should be able to make an easy chocolate cake. And I needed one,  so this one of Deb Perelman seemed pretty easy and not like some of those 3 hours chocolate cakes out there....like come on, 3 hours????  Deb just always makes cooking seem like a walk in the park.

So this cake was good although not "ball knocked out of the park", nope. But decently good. So I though I would write it here just in case I would make it again.

INGREDIENTS:

For the cake:

-85 grams of butter (room temperature)
-145 grams/ 3/4 cup  of light brown sugar.
-2 tablespoon/25 grams of white sugar.
-1 large egg and a yolk.
-3/4 cup/175 ml  of buttermilk.
-1 tsp/5 ml of vanilla extract.
-1/2 cup/41grams of cocoa powder.
-1 cup/125 grams of flour
-1/4 tsp of baking soda.
-1/2 tsp  baking powder.
-1/2 tsp of salt.

For the frosting:
-55 grams of dark chocolate, melted and cooled.
-1&1/2 cup of powdered sugar.
-1/2 cup/115 grams of butter softened.
-pinch of salt.
-1 tablespoon of whole milk.
-1/2 tsp of vanilla.


STEPS:
1. Before you start this recipe make the buttermilk and remember to take out the butter of the fridge.
2. Beat with a hand mixer the butter and sugar until it is combined well. 
3. Now add the egg, and the egg yolk, and beat at high.
4. Now add the buttermilk and beat.
5. Now add the baking powder, baking soda, and sea salt and beat.
6. Now add the flour and cocoa powder and beat.
7. Now bake at 175 degrees for 30 minutes. The dish can be 20x20.

Now for the frosting.
1. Melt the chocolate and let it cool off or it will ruin the texture of the frosting.
2. Now mix the softened butter with the powdered sugar and beat with the hand mixer.
3. Now add the chocolate, vanilla, salt and beat high.
4. Now add the milk and beat high.

Spread the frosting onto the cake! it is a generous amount of frosting, maybe too much. 
Verdict: not bad at all. Sprinkle it for a happy look and enjoy. I mean: who does not like a piece of chocolate cake even if it isn't the best??? 

Monday, December 11, 2017

Bug & Berry Cake

Made this cake for my sister and thought I would post even though I did not make the cake, it is a mix.   I called it my bug berry cake. 

Ingredients:

  • 1  Chocolate Mix Cake. 
  • 1 Chocoloate icing.
  • A small box of gooseberries (grosellas).
  • 2 boxes of raspberries.
  • 1 small of fresh cranberries.
  • ladybugs candies.
  • Marmalade.


Steps:

So I was in a rush for this cake so I had to buy the mix and the chocolate icing. So ....

  1. Step one: Make the cake with the mix cake. 
  2. Put the frosting on top. This frosting really works like glue with the fruit.
  3. Wash the berries and dry them a bit so that they stick to the icing. 
  4. Distribute them evenly, don't just throw them without any order...it has to look varied and the cool thing about this cake it's the many red tones that go from bright red till almost black.
  5. Place the ladybugs or whatever cool candy you have on top.
  6. Stick in on fridge so that it solidifies.
This cake really worked I have to say.....it saved me big time, cause it looked awesome and very elegant and fun, perfect for December. My nephews couldn't stop looking at it and kept looking for the ladybugs. 

Also the combination of rich dark chocolate and acidic fruits really worked, as it balanced it out.   Lastly, try to find reasonable berries because they are expensive. I bought the canadian fresh cranberries in El Corte Inglés (posh supermarket of snobbish Madrid) but the rest I got them in LIDL and was just glad for the extra walk there.


I should probably cook like my hero Julia Child. How cool is that outfit?  


Wednesday, November 2, 2016

Carrot Cake - Tarta de zanahorias

An awesome carrot cake that is so easy and so works!!!!!!!!

I've been meaning to post this one forever but never got to it, but thought, next time I do it, I will post it.

I did it for my birthday and brought it to work and also did another one for my Bible Study. EXITO ROTUNDO, as we, the spanish say.


INGREDIENTS:
-225 grs. of flour.
-2 teaspoons of baking powder.
-2 teaspoons of grounded cinammon.
-1/2 teaspoon of salt.
-250 mls of sunflower oil.
-200 grs. of sugar.
-3 eggs
-4 carrots.
-2 handful or 60 grs. of wallnuts.

And for the icing:
-125 grs of cream cheese.
-75 grs of butter.
-100 grs of sugar.
-1 teaspoon of vanilla essence.

STEPS:
1. Mix eggs and sugar with a hand mixer. Important, not by hand because you need to get a nice emulsion.
2. Now add the oil, little by little and mix with hand mixer. Do it carefully because it can split, like it happens with mayonnaise. I had to throw a whole mix away because of this.
3. Now in another bowl, place the dry ingredients: flour, baking powder, cinnamon and salt. Mix them all together.
4. Now add the dry ingredients to the wet ones.
5. Now grate the carrots and add and stir, and the same with the walnuts.
6. Preheat the oven to 200 degrees and then set it on the medium tray to 175 degrees. Leave it for about an hour in the oven until a toothpick comes out dry.
7. Leave the cake outside and let it cool off before adding the icing. 

8. For the icing, mix the cream cheese, butter and sugar. I cut the sugar of the original recipe in half because it was way too sweet for my taste, but the original recipe says you should do 250 grams. Way too sweet....perhaps for american taste. (YES THIS IS TOTALLY RIGHT!!! I followed the original recipe and it was a disaster with so much sugar)

9. You can also add another layer of frosting in the middle of the cake, to make it more glamourous. And of course, top it off with something fancy and fallish decoration.

I hope you enjoy it. 

Copyright: Paloma de la Rica, your recipes are just amazing from another world and they ALWAYS work...thank youuuuuu you make our lives better.

Sunday, February 1, 2015

Banana Bread

We are having some real cold days in Madrid and all I want to do is curl up with my computer, books, and cook the winter classics.

So here is a pretty good recipe, perfect for winter days, that I got down at a Thanksgiving party in Madrid this fall. The girl who gave it to me said it was jewish!
I don't think there is anything really jewish about it, but it is quite good and super easy....for a long time I have looked for a banana bread recipe for dummies, that you just can't spoil, and really, it's very difficult to mess this one up.


Ingredients:

1. One cup and 1/4 of flour, or 125grs.
2. Two eggs.
3. 1 loaded teaspoon of baking powder (levadura)
4. 1/2 teaspoon of salt.
5. 1/4 cup of sugar, or 4 spoonful.
6. 4 spoonful of margarine
or 1/4 cup.
6. 3 small bananas or 2 big ones.
7. A cup of walnuts o un buen puñado.

STEPS:

1. Mix the flour, eggs, baking soda, salt, and sugar. It becomes a really thick paste.
2. Add the bananas to the mix. The softer the bananas are the better.
3. Add the walnuts.
4. Grease the "baking tray", with butter and then sprinkle with flour.
5. On to the oven for 30 mins or 35, at 180 degrees, only button rack!!! not grill!

That's it!  Enjoy. I used this "molde de corona", because it distributes the heat very evenly but maybe you could try another type of baking container and let me know how it went.

 What do you think? I think this recipe is a keeper. I brought it the other day to my friend's dinner and they loved it :)


Sunday, January 26, 2014

A piano cake for "big sis"

Inspired by Betty Crocker, I made this cake a while to my musical older sister María, who plays the piano.  You can see her beautiful piano that inspired me here.
Mine, as you can see above, didnt quite turn out that way, but hey! I tried..

1. I did not make the cake either, because I was so busy around that time of year....so I cheated and used a mix, a Betty Crocker one as well, Devil's Food cake...yes please. 
2. So good, so easy..okay and now off to cutting the pattern of the piano. 


3. I had to do some thinking here...and look at many "patterns". Then I picked up a piece of paper, drew and cut off the shape of my favorite piano. 


4. Pick your bread knife, and carefully follow the pattern...


5. Now time to spread the icing. 

Again, I used Betty Crocker Devil's Food chocolate icing...it's so good...so as I was spreading the icing, the whole cake was falling apart, because the cake was sticking up to the icing, lifting it up and just coming undone! 

FRUSTRATION!

My american roommate Angela came to my rescue. She explained to me that the right way to spread icing is to just drop a big amount of icing onto the cake and then with a butter knife move it around and spread it around.

 So kinda like in the photo, be generous and follow this trick that will prevent you from ruining your cake.


 6. Okay, so once I spread the icing, easier said that done for sure, I did the "seat" which was the left over  part of the cake that I cut off.


Not very even this piano of mine...but it was hard...


The next step....and how do I carry this guy now to the birthday place?? 

I thought it would be fun to have a "partitura", music sheets, to make my piano more fun and musical. So I what I did was to pick up my oven tray for cookies and wrapped it with "Happy Birthday" music sheets that I printed at work....


 Then I picked up this big box to carry the box and leave the pretty tray intact till the serving moment.

So this is the way I decorated the cake, at the house where I served the cake, I used 2 Kit-Kats, and one white chocolate bar. With my edible markers I drew some notes to make a little music sheet. I held it with toothpicks. Also, I bought velas magicas, sparklers that keep sparkling.


It was a fun cake to make it....I recommend it for anyone you love that is musical.


try it!

Wednesday, July 24, 2013

Watermelon cake- Tarta de sandía


Back in my cooking days I did this watermelon cake. It was fun to do...just a fun way to eat watermelon to bring to a party or even as a summer cake for a birthday. (Mind you, this is not substitute of a proper cake....come on....)

But I loved the idea, so I went ahead and did it. It was pretty fun. As always....not so easy to do in real life. But a challenge. All you need is:
  • A watermelon
  • A heck of a good knife/sword???
  • A marker.
  • Measuring spoons made or metal or an ice-cream scooper.
Pretty self explantory, follow the pics and you will succeed. OH! by the way, this recipe is from this blog. By the way I loooooooooooooove her blog. Thank you Bri, you brighten our world with your blog and recipes! 

1. Mark the lines to not go off track.


2. Now cut it up in slices, like a cake.

3. Scoop out watermelon and place them on top of cake. 


HAPPY PARTY or HAPPY BIRTHDAY!


Mint to top it off!  It's fun to bring to a party for sure!