Tuesday, November 5, 2024

Miso Chicken Meatballs


Melbourne, the city of incredible Asian food

 So I have no idea where I got this recipe from...I forgot to pin down the link so I apologize to the person who has created it, and if you see this recipe please write a comment and will link my post to your website. 

So. Tired of bland meat? I am too, often. So this recipe provides an alternative to eating tasteless chicken all the time. Here it is:

INGREDIENTS: 

For meatballs:
-600 grams of turkey.
-1 shallot sliced.
-2 teaspoons of grated ginger. 
-2 garlic cloves crushed or minced.
-3 tspoons of miso paste.
-1/4 cup of breadcrumbs.
-salt and pepper.
For the sauce:
-60 ml of mirin sauce.
-60 ml of rice wine vinegar.
-2 tablespoons of honey.
-1 teaspoon of ginger grated.
-2 teaspoons of miso paste.

STEPS:
1. In bowl add all of the ingredients for the meatballs, mix well and make round meatballs. Fry them in low heat until the are cooked inside.
2. Whisk all of the ingredients for the sauce.
3. When the meatballs are cooked, pour all the sauce on top of them and simmer them a little and let them get juicy. 

Yum, that's it guys. Not bad, definitely some work but doable. I am back to the world of work, no time to breathe...good-bye cooking for a looooong time. Hence my lack of posting.


Saturday, May 18, 2024

Peanut and Vegggies Noodles


This recipe has reminded me that I have been cooking functional food for about 6 months. Here is the reason:  Stress, stress, studying, sicknesses, more stress, studying, more sicknesses, ankle sprained and more stress. 

Don't you guys agree that cooking is a sheer nightmare when life is overwhelming? And yet it has to be done if you want to remotely function.

But this recipe looked so good and now that I am done with my exam (which I am 90% sure I will fail), I needed to do it because I was sure it was going to be a keeper and of course it is. I asked Kenton about this he said: "Heck yeah, why are you still standing there?".

But first of all, I want to thank Deb Perelman for making my life SO MUCH BETTER. Seriously, you are wonderful Deb. Life is rough but your recipes have made my life so much richer, not just because the food is great, but simply having your creativity and blog and writing in this world. I just love you and I also love New York. 

INGREDIENTS: 
For sauce: 
-1/2 cup of peanut butter (4 or 5 heaped tablespoons).
-1/4 cup of soy sauce.
-1 tablespoon of ginger grated.
-1 garlic clove grated.
-2 tablespoons. of rice vinager (or really any)
-1 +1/2 tablespoons of sesame oil.
-1 tablespoon of honey.
-1 tablespoon of chili oil with flakes, or pepper flakes or some spicy sauce.
-1/3 cup of water.
-Sesame seeds (for decoration: totally optional).

For the noodles: Some noodles, any you want, wheat, soba, whatever.

For the veggies: raw veggies cut in slices like ...
-carrots 
-cucumbers,
-peppers 
-green onions cut all in slices. 

For the meat: cooked chicken or tofu cut in cubes.
STEPS:
1. I mean the steps are simple. Cook the chicken and cut it in cubes seasoning with salt-pepper.
2. Cut the veggies in slices and put in Tupperware container. 
3. Cook the noodles, usually 5 minutes in boiling water and cool them off with cold water.
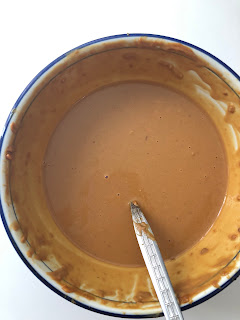
4. Make the sauce. Stir it well and thin it out with water.

And that's it guys. Throw it all together for a great tasty meals. This dish can be cold or hot, so it is perfect for summer too, and if you want it warm stick it in microwave for 30 seconds. 

The hardest part of this dish is not eating the whole bowl of peanut sauce....it is so good it will knock your socks and the ball out of the park! 

I made double actually and will freeze half. :) 

The photos are Valencia, not Australia, although
it surely looks like Oz...like Northern Territory.

Wednesday, February 7, 2024

Tapioca Pearls with Coconut Milk


It has taken me years and years to be able to publish this recipe, but here it is. First trying to find Tapioca pearls in Spain, which seemed an impossible task, only Sago pearls, which is not the same. THEN, finding a good and simple recipe. Found one in Australia and then lost it. But This recipe really has helped me to nail this dessert. Thank you to this person. Sometimes the most simple recipes are the hardest, and this one seems to be one of them.

So I have just spent today 2 hours throwing a ton of tapioca away after failed attempts. Bad videos everywhere in the internet. This is why I keep this blog, to have things ready to go, or you have to watch and read hours of recipes again. Okay so it is the starch of the tapioca which makes this simple recipe complex, because if you are not careful the whole thing becomes a gelatin mess. But here is the solution. 

INGREDIENTS:
-1/2 cup of tapioca pearls.

-1/2 cup of sugar.
-1 pinch of salt.
-1 can of coconut milk.
-5 cups of water (1.200 ml)

STEPS:
1. Get 5 cups of water and bring to boil. Now, to this boiling water add the tapioca pearls, no rinsing and no nothing, just straight from the package to the pot.
2. Stir them in the boiling water for about 7-8 minutes. Stir, and stir and stir and stir while you listen to your favourite podcast.
3. Now rinse them in cold water, lots of them and set them apart. They will still have a white centre, they will be half-cooked, like in the photo.
4. Now set in the same pot the coconut milk and 1/2 cup of water. Bring to a boil and quickly add the sugar that will dissolve instantly and the salt. Stir quickly and mix it all. 
5. Now add the tapioca pearls and stir, stir, and stir for 15 minutes in medium fire. They willl be cooking through, stir, and stir. 
6. Now lower fire to a minimum and let the tapioca pearls absorb the milk remaining, maybe cover, but be really careful to not let them stick to bottom or burn. 

That's it. Tadah. 

Great texture, just like in Thai restaurant. If it is not sweet enough, just sprinkle some caster sugar and it will be fix it. The dish gets better with time, because the flavours come together.

Finally I nailed this. This was one of my fave desserts in the whole world. And now I've eaten so much tapioca this evening, that I'm going to explode. 
Pics: Singapore.

Friday, January 12, 2024

My Christmas and Easter Lamb


So the story of this lamb mold started last Easter when Kenton and I ate pizza for Resurrection Sunday and it was the most depressing thing ever. 
-"We need traditions!", I told him.  

So I went back into Pinterest and looked into my Easter pins and found this awesome lamb cake so my friend Cristina, brought it all the way from me from the USA.

25 bucks is a great investment for this mold! and I thought: why not use it for Christmas? At the end of the day we celebrate the birth of the Lamb of God, so I made it of chocolate. 

And here is the winner recipe that rocked my world. A heavy, very chocolaty cake. I followed the recipe that cake with the mold, but then added a ton of dutch cocoa. YUUUUUUM you all. This recipe is a keeper, even my mom agreed.
 

INGREDIENTS

-1/2 cup of butter, 115 grams 
-2 eggs
-3/4 cup of buttermilk
-1 tsp baking soda
-1+1/2 tsp of baking powder
-2 cups of flour, 240 grams.
-100 grams of chocolate 70%.
-4 tablespoons of Dutch cocoa.
-1 cup of white sugar, 200 grams.

STEPS:
1. Mix butter and sugar and vanilla and eggs until light and fluffy with mixer.
2. Now add to the mix, the dry ingredients: flour, baking powder, baking soda.
3. Then add the 100 grams of chocolate melted (in the microwave will do), the buttermilk and then the cocoa powder
4. Butter the mold well, with a lot of butter and then sprinkle with a lot of flour. This is key for your lamb to work well. 
5. Bake in 180 degrees for about 40 minutes.
6. Let it cool off for a long time! and then sprinkle it with powder sugar. Wow. Gorgeous lamb.

The mold is from Nordic Ware Spring by the way. And the blueberry recipe lamb is from my blueberries muffins.
  

Thursday, January 11, 2024

Asian Chicken Noodle Broth by Jamie Oliver


This soup of Jamie Oliver is fantastic. I cannot recommend more his book "The Ministry of Food" in which he teaches people to cook from scratch. So good. If you only have one cooking book, have this one. If you master that book, you are a great cook already.

Back to the recipe. Simple. The key ingredient to have is "5 chinese spice", very popular and not hard to find.  

INGREDIENTS:
Broth: 
-2 litres of chicken stock. 
-A piece of ginger.
-Serrano peppers for spiciness (optional).
-2 tablespoons of soy sauce.
-1 lime.
-sesame seeds and some toasted nuts (optional)
---------
-500 grams of chicken.
-300 grams of noodles.
-2 bock choy or a handful of mangetouts.

STEPS:
1. Cut chicken in stripes and coat them well with 5 chinese spice, like in the photo. Now sautee them in medium fire until golden (be careful to not burn the spices, have medium fire). Once ready set it apart.
2. Cook which ever noodles you want separately. You can add them too in the broth and cook them there, but I like to do it separately because the broth them is more clear.
3. Get the broth going separately. Put the chicken stock,  2 litres of water, and the ginger together, bring it to a boil.
4. Once it boils, add the green beans for 2 minutes. 
5. After 2 minutes in which the green beans have softened but are still very crunchy, add noodles and chicken, bring it to boil again and immediately turn off fire.
6. Now finally add 2 tablespoons of soy sauce and stir. 
7. The finally touch is: squeeze in each bowl the lime, half lime for each bowl and sprinkle sesame seeds. The sesame seeds are optional but the lime is not optional, it makes it 5 times better.
Voila. C'est magnifique. 


Tuesday, December 5, 2023

Spanish Cheesecake--Tarta de Requesón


This cheesecake is simply the BEST, as Tina Turner puts it. It really is. The way a true cheesecake should be, perhaps I should say: the way a true SPANISH cheesecake should be.  

So, I'm just gonna cut straight to the chase, or should I say: to the cheese. I took me a long time to find this recipe but this chef in this elaborate blog, nailed it. Well done Juan Andres. I hope you don't mind that I share your recipe with English readers. 

INGREDIENTS:
-600 grams of requesón. 
-5 eggs.
-30 grams of cornflour.
-150-160 grams of sugar.
-200 ml of heavy cream.
-the zest of a lemon grated (my addition)
-a mold of 22 cm of diameter.

STEPS:
1. Very easy to do. Mix all of the ingredients with a hand mixer. 
2. Set your oven, heat up and heat down to 180 degrees.

3. Now place the cream mix in a mold, you can use oven paper to make it easier, like the pics.
4. Just bake it until it looks golden. You might have to turn off the top part if it starts to brown too much. The original recipe says 50 minutes, but my weak oven required one hour and 20 minutes....just keep checking until the knife comes out clean.
5. Once it is out of the oven you need to let it cool off. Once it is cooled, put it in fridge for some good hours.  THEN and only then, it will be ready.

SO SO good. I just could not believe how awesome this cake is. It is exactly the spongy cakes you can buy in Dia or LIDL. That type! not the flan ones. 


Monday, November 27, 2023

Oats and Chocolate Cookies


Oh I had been wanting to make this recipe for a long time. So I found one at the back of an oats package in LIDL and thought: this will do. And guess what, it does, and real well.

Here it is before I lose it or forget it again.

INGREDIENTS:
-200 grams of oats.
-1 egg.
-125 grams of butter.
-125 grams of sugar.
-1 tsp of vanilla essence.
-125 grams of flour.
-1 tablespoon of cocoa powder.
-100 grams of chocolate chips.
-1 tablespoon of baking powder.
-5 tablespoons of milk.

STEPS:

1.Melt butter in bowl and then mix it with sugar and the egg. 
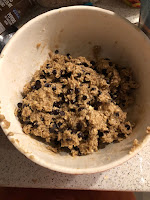
2. Now add the rest of the ingredients except for the chocolate chips, so that would be: the oats, the vanilla, the flour, the cocoa powder, the baking soda, and finally to make it all mix together and glue it, you add the milk.
3. Now add the chocolate chips and mix. 
4. Now in baking paper make little balls on tray and smash them with spoon, if you leave them as balls they won't go flat and won't cook.  
5. Have your oven at 180 degrees, only fire down! and stick cookies. Okay listen to this now: THEY WILL BURN!!!!!!!!!!!!! EASILYYYYYYYYY so watch out for the oven. 14 minutes or so.....keep looking at them because they burn fast.

They are very good. I had been looking for this type of recipe for a while and here it is, in the back of package of oats.


Tuesday, September 12, 2023

Fantastic Meatballs


 This recipe of Deb Perelman is simply great....pretty much like anything she does. 

I have been meaning to post it for 2 or 3 years and never got round to it....so I've had to keep going to it and re-learn it over and over....a waste of time. Plus this summer has been nuts looking for a new place to live, but here I am back in September trying to get in touch with routines a bit and writing down my to-go-to-recipes to feel like a functioning person again.

 So here it goes:

INGREDIENTS:
For the meatballs:
-1/2 kg of mince (pork and beef).
-2/3 cups of breadcrumbs.
-1/3 cup of milk (70 ml).
-2 tbsp. of chopped parsley.
-3-4 tbsps. of parmesan cheese.
-1,5 tsp of salt.
-a pinch of red pepper flakes.
-1 tsp of onion powder. 
-2 eggs.
-1 garlic clove minced.

For the sauce:
-700 grams of tomatoes canned (ideally chopped)
-1 garlic clove minced.
-1 tsp of dried oregano.
-1,5 tsp of salt.
-some olive oil.


STEPS:
1. Add meat, crumbs, milk, parsley, cheese, salt, pepper flakes, onion powder, eggs, and 1 garlic clove minced in bowl. Mix with fork and arrange in balls on a plate.
2. Once you finish that part, have a big pan with strong fire. Add oil and the garlic until it is golden.
3. Now add the tomatoes. A big splash will occur. Add the salt and the dried oregano. And let it all simmer for 10 minutes with a lid on.
4. After 10 minutes, place the meatballs in the sauce and let them cook there for about 15 minutes placing a lid on. After a while turn them around and they just get cooked on their own.


That's it. So tasty.
 You can serve it with garlic bread. Toast bread and then rub some garlic on it. Who would have thought you can ask milk to raw mince, but it turns out to be great.